In previous installments of this series, you learned how to start inventorying your learning materials in UVACanvas (Part 1) to focus your work on improving accessibility. Then you learned how to start assessing the accessibility of those materials (Part 2). You explored automated tools like the UDOIT Accessibility Report and Microsoft’s Accessibility Assistant to help identify areas of improvement. Now, in Part 3, it’s time to dive in and start making those improvements.

Strategic prioritization
As you prepare to start making improvements, your first look through your inventory or list of pending items can be daunting or downright intimidating. It’s important to remember that improving accessibility is not a sprint or a project — it’s a new way of working that you adopt and continue to develop over time. To make that work as effective and sustainable as possible, it’s important to approach that “to-do” list strategically.
As you review the materials in your inventory from Part 1, and the specific opportunities for improvement identified by the assessments from Part 2, consider two key questions:
- “How much impact will this improvement have for my students?” Consider factors such as class size, how often or how much students will use the materials, and whether the materials are required or optional in support of your learning objectives and assessments.
- “How much effort will this improvement require of me?” Consider whether this improvement uses skills you already possess or will need to develop, how complex, repetitive, or time-consuming that work will be, and whether any parts of that work can be reliably automated.
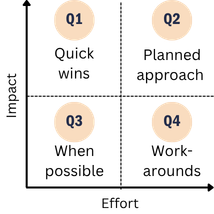
When considering those questions, mentally situate each document or task on a graph like the one above. What quadrant does that task or material fall into?
- Quadrant 1: Quick Wins is for changes that will have high impact and require low effort. These are your quick wins and should be the items you move to the top of your to-do list. Complete these items first to build momentum and achieve real improvements for your students promptly.
- Quadrant 2: Planned Approach is for changes that will have high impact and require greater effort. These items will require a planned approach, so you’ll want to block out dedicated work time on your calendar to make progress on them. You’ll also want to consider when your students will need these materials, and sequence your work so the first things they need are the first ones you work to improve.
- Quadrant 3: When Possible is for changes that will have lower impact but also require low effort. These are your “grab bag” items. Keep them in a list so you can grab and do them as you have time in between other activities, and without imposing on the time you’ve set aside for Quadrant 2 planned activities.
- Quadrant 4: Work-arounds is for changes that will have low impact and require high effort to achieve. For items in this quadrant, it’s worthwhile to take a little extra time to brainstorm creative work-arounds or new approaches that could support your learning objectives, and be more accessible, sustainable, and/or impactful. As with Quadrant 2, you’ll need to block out time on your calendar to address these items, but because Quadrant 4 has lower impact than Quadrant 2, you’ll want to prioritize accordingly.
Short-term alternatives
The reality is that you can’t do it all at once. Even when you’ve prioritized the most important materials first, it’ll still take you time to work through your punch list. So when it comes to the work that’s not at the top of your priority list, it’s also important to pre-plan how you can minimize the identified barriers your students may encounter in the meantime.
If you wait to think about alternatives until a student approaches you to report a barrier, you’re placing extra stress and burden both on yourself and on your students. You’ll be more agile and able to address students’ needs in a timely way if you:
- put some thought into what you’ve learned from your assessments,
- anticipate the kinds of barriers students could face while using your materials, and
- think about temporary alternatives you could implement while you’re working on more permanent improvements.
For example, here’s the kind of advance planning that you and your students will find helpful:
- If you’re aware that some of your course readings or content could present a barrier, can you identify alternative sources – possibly in other formats – that students could use to understand the material? For example, are there accessible videos, audio recordings or podcast episodes that could substitute for readings, or vice-versa?
- If you’re aware that one of your class assignments or activities could present a barrier, can you think of alternative ways that students could demonstrate their mastery of the learning objective(s)?
- If some of your class activities require students to be present in person to participate or earn credit, can you think of other ways that students could gain the same value and/or credit if an illness or disability prevents them from attending class that day?
If you document these ideas for yourself — possibly as part of or linked to the inventory you created earlier — you’ll be better able to respond when you become aware that a student is facing a barrier with materials or assessments in one of your courses.
Take action and track your progress
You’ve prioritized your work, you’ve blocked out time — now, you can roll up your sleeves and jump into it. But before you do, make some notes about where you’re starting:
- How many documents or items in your inventory need to be addressed?
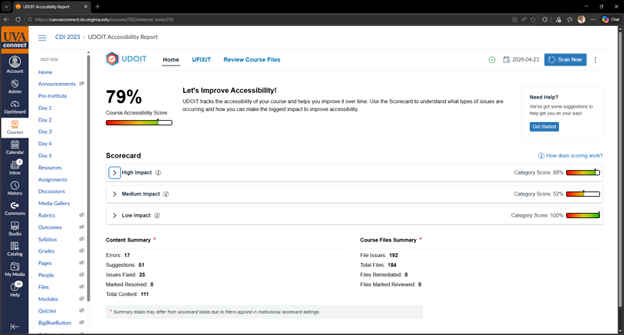
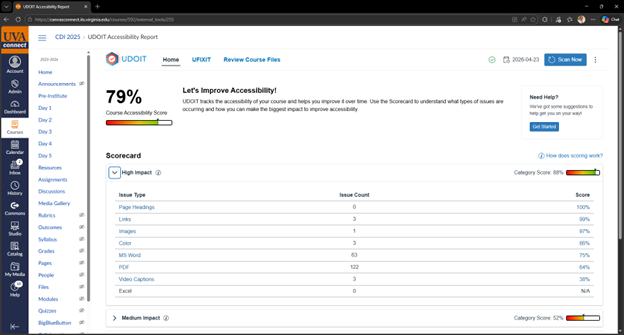
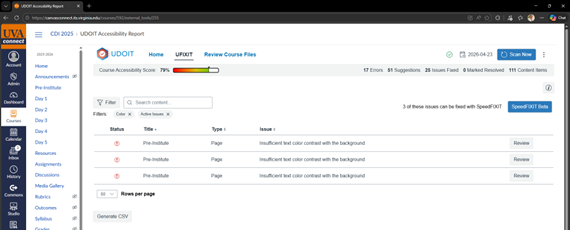
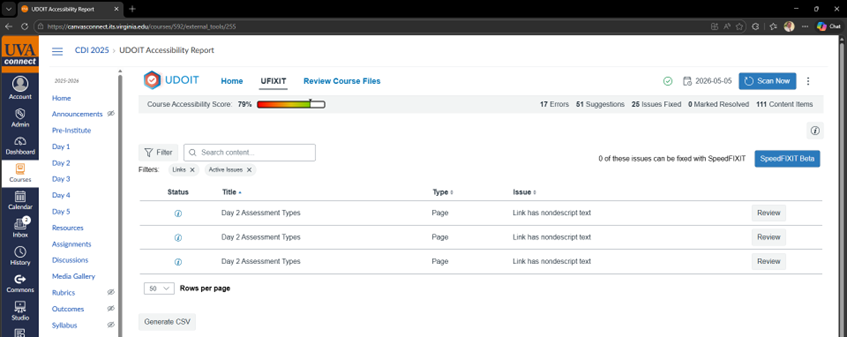
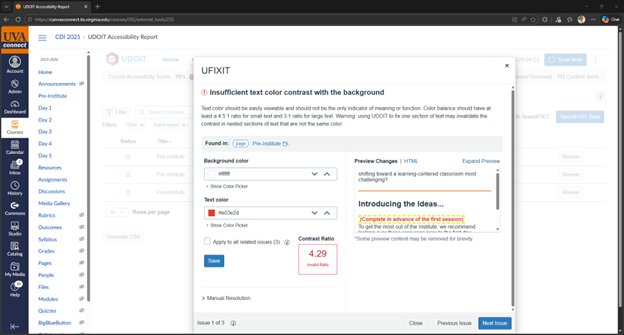
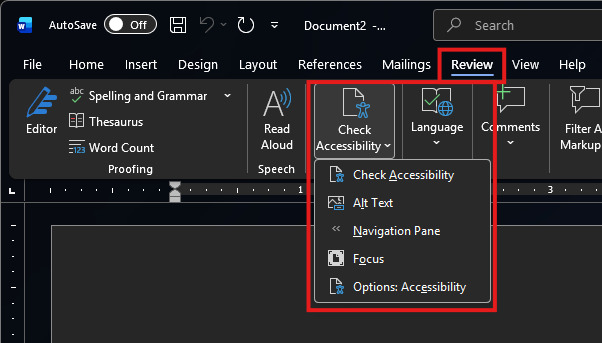
- What scores do you currently see in assessment tools like UDOIT?
- How many “issues” or tasks are on your to-do list(s)?
It’s useful to capture this information up front, and then periodically check in and capture the same metrics later, so you can see (and show) the progress that you are making as you do the work. Also, as you improve and resolve issues with materials in your inventory, “check them off” in a column on your inventory spreadsheet.
Conclusion
Developing more accessible and inclusive learning environments isn’t a project or side quest — it’s an integral part of our growth as educators. It requires intention, strategy, planning, and execution. The more you do it, the more it becomes second nature and fully integrates with the way you plan and develop your courses. You’ll find that as you integrate accessibility earlier in your planning and design processes, it will become easier than addressing it only after testing or only after problems have been reported. Designing and building learning environments that are accessible from the outset requires much less effort than retrofitting or overhauling them later.
For now, it’s important to take a planned, strategic approach to the work in front of you, so it can be both effective and sustainable over the long term:
- Inventory what you’ve got,
- Assess the opportunities to improve it, and then
- Prioritize, execute, and track your work.
Taking the time to follow these steps is a continuous act of caring for your students, ensuring they can reach their maximum potential and, most of all, showing them that they belong. You may never know the impact these individual actions can have, but their cumulative effect can be life changing.
If you have questions or would like to discuss further, please feel free to leave a comment below or contact cte-accessibility@virginia.edu.